
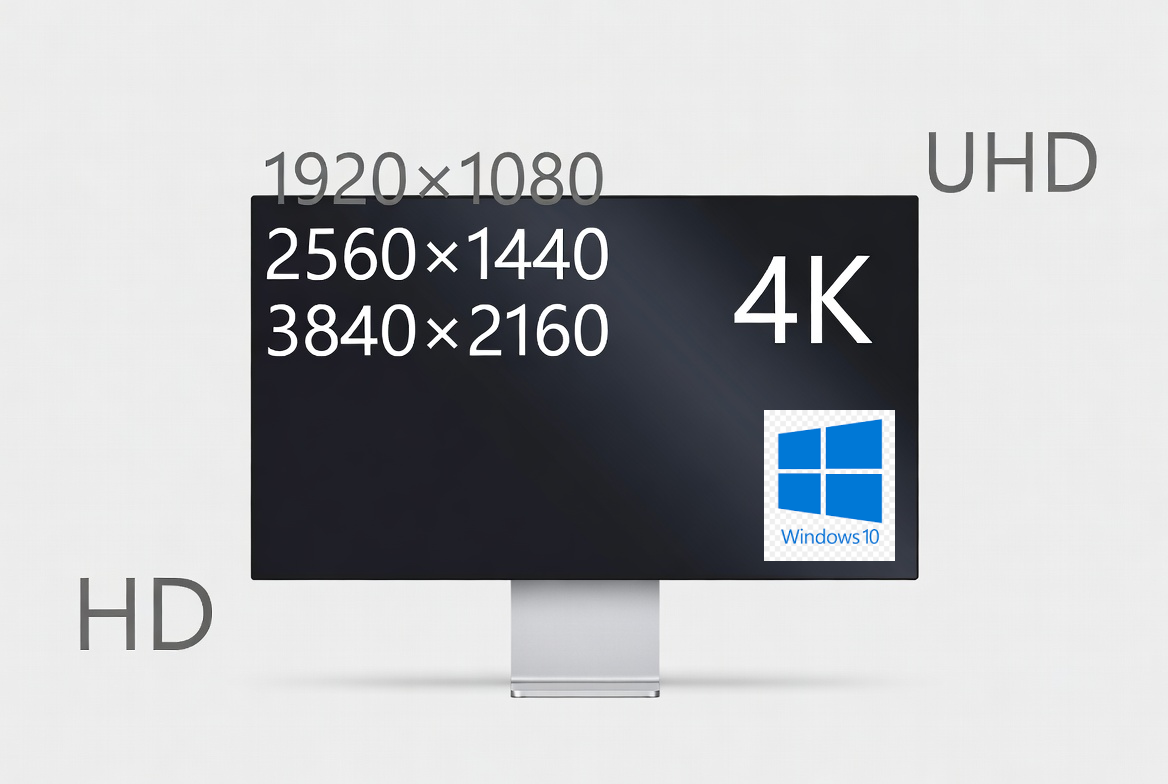
Your screen resolution determines how sharp and clear images, text, and videos look on your Windows computer. Whether you’re optimizing your display for gaming, editing, or general use, knowing how to check or change your screen resolution is essential.
This guide will help you understand what screen resolution is, how to check your current display settings and how to adjust them properly on Windows 10 and Windows 11.
What Is Screen Resolution?
Screen resolution refers to the number of pixels displayed on your monitor, shown as width × height (example: 1920 × 1080).
Higher resolution = sharper images, better clarity, and more workspace.
Common resolutions include:
- 1366 × 768 – basic laptops
- 1920 × 1080 (Full HD) – most modern devices
- 2560 × 1440 (2K) – productivity and gaming
- 3840 × 2160 (4K) – ultra-high definition displays
How to Check Your Screen Resolution on Windows 10 / 11
Method 1:Using Windows Display Settings (Recommended)
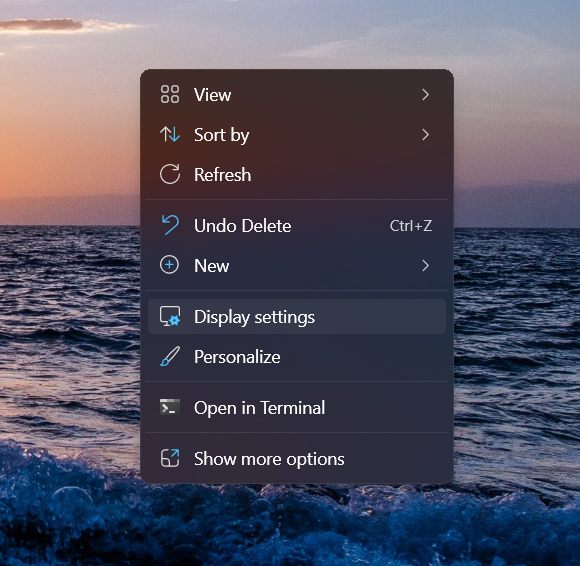
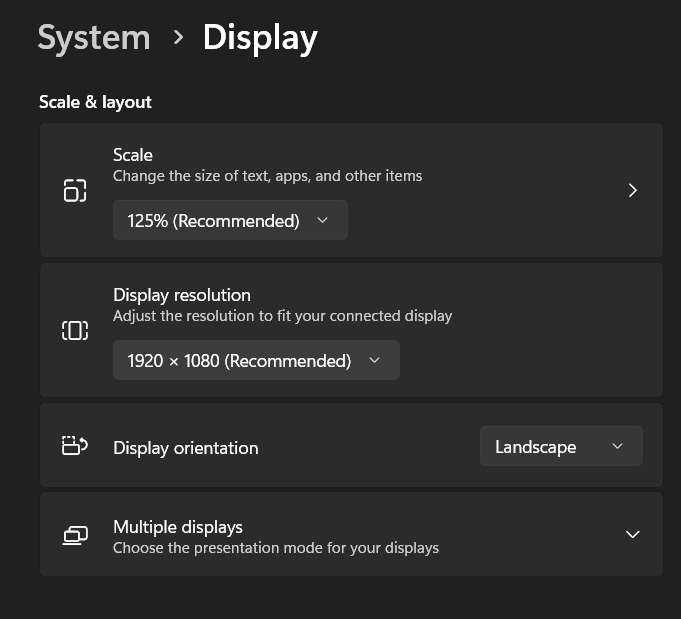
- Right-click on the desktop
- Select Display settings
- Scroll down to Display resolution
- Your current resolution will appear in the dropdown (e.g., 1920 × 1080)
This is the fastest and most accurate method.
Method 2: Using Windows Advanced Display Settings (for multi-monitor)
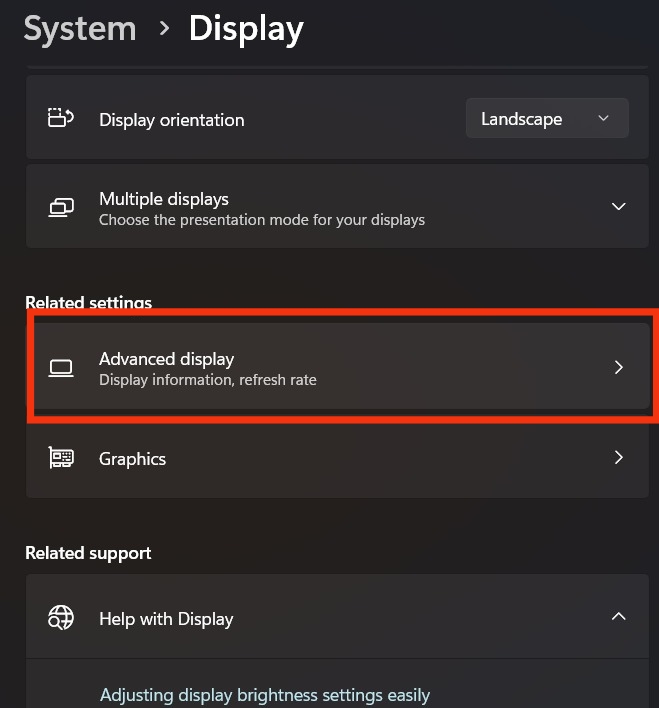
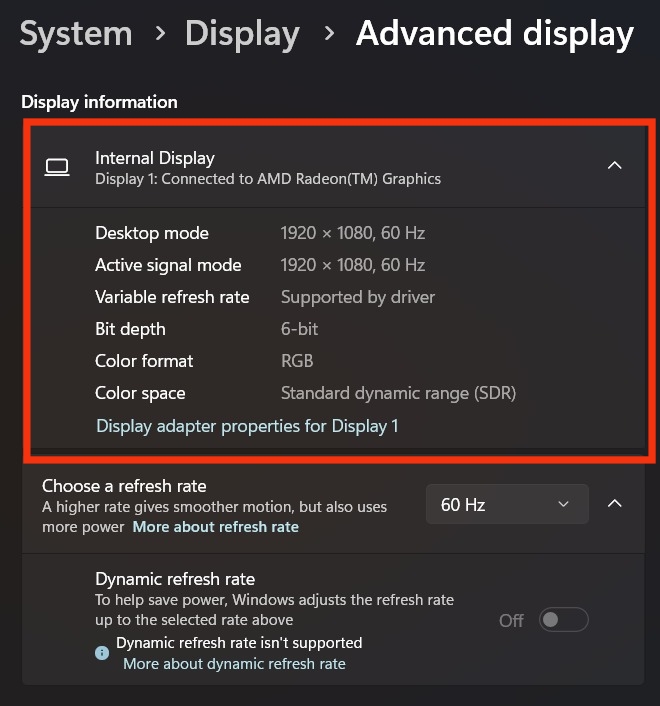
- Open Settings
- Go to System → Display
- Click Advanced display
- Under Display information, you’ll see:
- Resolution
- Refresh rate
- Bit depth
- Color format
- Monitor type
This method is useful if you have more than one monitor linked to your computer.
How to Change Your Screen Resolution on Windows 10 / 11
- Right-click anywhere on the desktop
2. Select Display settings
3. Scroll to Display resolution
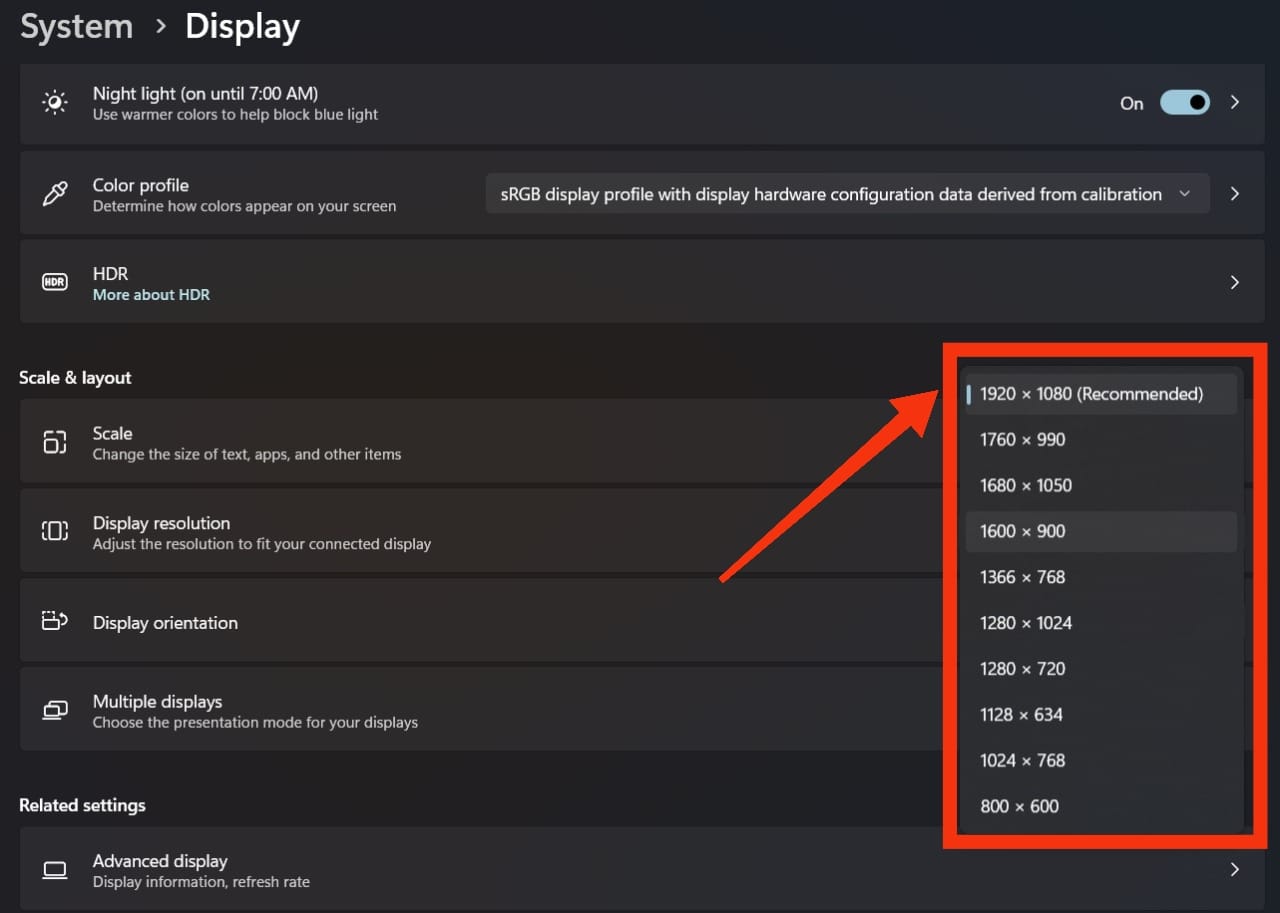
4. Click the dropdown and choose your preferred resolution
5. Select Keep changes if the screen looks correct
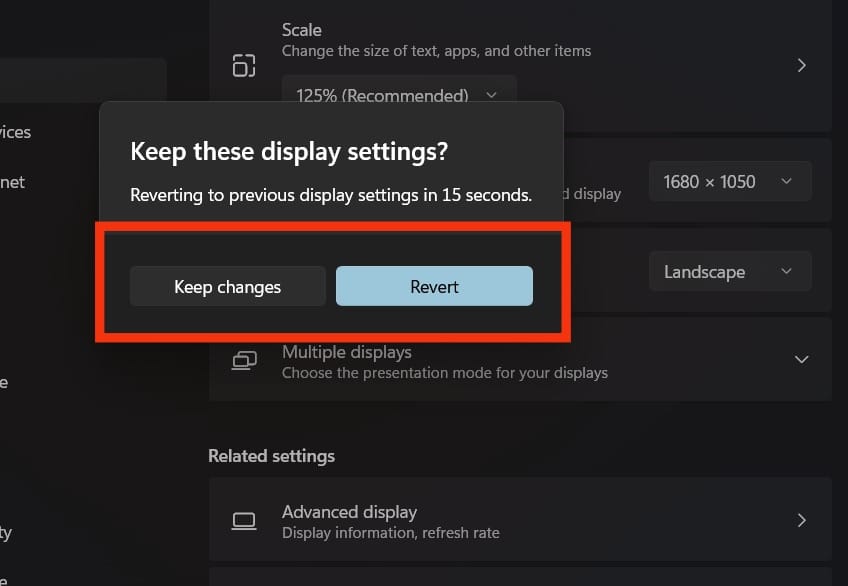
6. If not, click Revert (auto-reverts in 15 seconds)
Choosing the Best Resolution
Windows marks the recommended resolution with the label (Recommended).
Choosing the recommended option ensures:
- Best clarity
- Proper scaling
- No blurry text
- Best compatibility with apps and games
Why You Should Use the Recommended Resolution
Using a non-recommended resolution may result in:
- Blurry or pixelated content
- Incorrect scaling
- Black borders
- Poor video playback
- Unwanted UI stretching
For most users, the recommended resolution is the ideal setting.
How to Fix Screen Resolution Problems on Windows 10 / 11
1. Update Graphics Drivers
Outdated drivers can prevent Windows from showing the correct resolutions.
- Open Device Manager
- Expand Display adapters
- Right-click your GPU
- Select Update driver
2. Restart Your PC
A simple restart refreshes resolution options after updates.
3. Check HDMI / DisplayPort Cable
Lose or damaged cables may lock your PC at a low resolution.
4. Confirm Monitor Supports the Resolution
Not all monitors support 1440p or 4K.
5. Reset Display Scaling
Go to: Settings → System → Display → Scale → 100%
Incorrect scaling may create display issues.
Frequently Asked Questions (FAQ)
Right-click on your desktop → Display settings → Display resolution.
This usually happens due to outdated graphics drivers, faulty cables, or unsupported monitor resolutions.
1920 × 1080 (Full HD) works best for most users, but 1440p and 4K are ideal for bigger monitors.
Lower resolution = better performance in games.
Higher resolution = sharper visuals but more GPU usage.
Conclusion
Checking and adjusting your Windows screen resolution is simple and takes only a few seconds. Always choose the recommended resolution for the best visual experience. If you’re unsure about your current resolution, you can also use a free website to detect it instantly.
Leave a Reply